How to Organize Your Photography Files Like a Pro
- Jan 8
- 3 min read
Updated: Jan 10
If you’re a photographer, you know how fast files can pile up. RAWs, exports, Lightroom catalogs—it’s easy to lose track and slow down your workflow. Over the years, I’ve developed a system that keeps my files organized, my drives clean, and Lightroom running fast. Here’s how I do it.
Start With Lightroom Setup for Speed
Before you even think about folders, it’s worth setting up Lightroom in a way that maximizes speed and efficiency. A fast Lightroom workflow makes organizing and editing so much smoother. Here are my key tips:
Create catalogs by session, not year or month
I create a new catalog for each shoot and store it inside the session folder (more on folders below). Naming the catalog after the client’s last name or event works best—it’s easy to find later.
Set your previews for performance
Go to Edit → Catalog Settings → File Handling.
Use Standard Previews rather than 1:1 for most work, and only render 1:1 previews when you need high zoom or detailed retouching.
Purge cache regularly
Lightroom builds a cache of previews and metadata that can grow huge. Check Preferences → File Handling → Purge Cache every few months to keep things fast.
Keep your catalog and cache on your internal drive
Your internal SSD is way faster than an external drive. Even if you store backups elsewhere, working directly from the internal drive keeps Lightroom snappy.
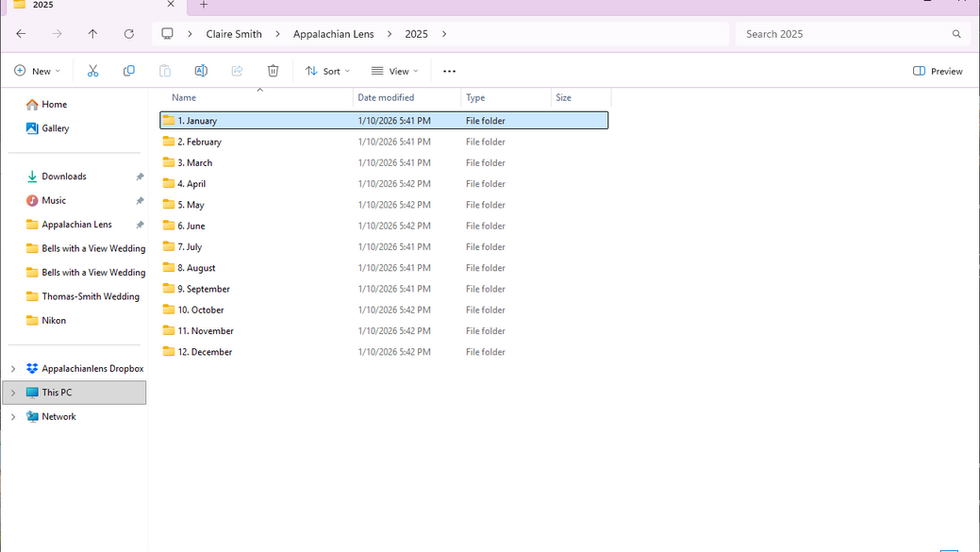
My Folder Structure: Organized by Month, Session, and File Type
Once Lightroom is optimized, it’s time to get your files in order. I keep a main photography folder on my internal drive and organize everything like this:
Folders for each month
1. January, 2. February, etc.
Numbering ensures they stay in chronological order when browsing your main folder.
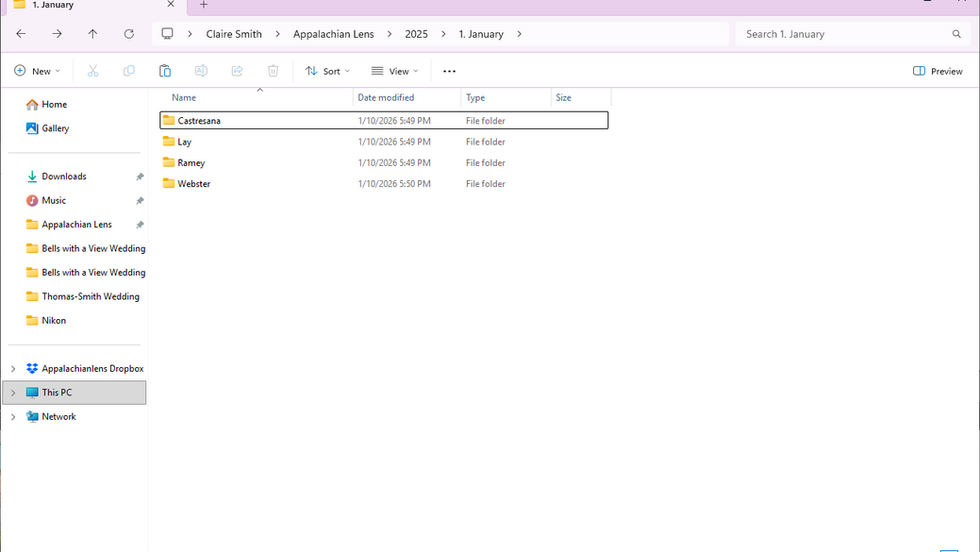
Inside each month, a folder for each shoot
For example: Smith Family Portrait or Johnson Wedding.
This makes it easy to locate sessions quickly without scrolling through a huge list.
Inside each session folder, three subfolders:
Raw – Upload your original RAW files here. Keep them untouched for archival purposes.
Lightroom – Store your Lightroom catalog in this folder and name it after the session (client last name or event name). This keeps your catalog tied directly to the files it contains.
Edited – Exported files, retouched images, and client galleries go here.


This setup keeps everything tidy: your RAWs are safe, Lightroom catalogs are session-specific, and exports don’t get mixed up with originals.
Bonus Tips for Maintaining Speed and Organization
Back up regularly: Once a session is complete, back up RAWs and exports to an external drive and/or cloud storage.
Use consistent naming conventions: For files, I often use Lastname_Sequence—it makes searching and client delivery easier.
Purge Lightroom previews and cache periodically to avoid sluggish performance.
Monthly cleanup: Check your internal drive with a tool like TreeSize Free to spot hidden cache or duplicates.
Having a clear, consistent folder structure and an optimized Lightroom setup does more than keep you organized—it keeps your workflow fast and stress-free, especially when you’re juggling multiple clients or editing on the go. Personally, following this system has saved me hours of scrolling, searching, and duplicate work, and it keeps my internal drive tidy for smooth editing every day.
Keeping your files organized like this makes editing a lot easier, but even the best folder system can get bogged down if your drive is full. I’ve had plenty of sessions where Lightroom slowed to a crawl simply because my internal drive was packed with old RAWs, previews, and hidden cache files.
If you want to free up space and speed up your workflow even more, check out my guide on how to reclaim hard drive space using TreeSize Free. It walks you step by step through finding hidden files, clearing Adobe cache, and making sure you have plenty of room to edit directly from your internal drive—no external drives needed. Combining smart file organization with regular cleanup will save you hours of frustration and keep your editing smooth and stress-free.


![How Photographers Can Free Up Hard Drive Space Using TreeSize [For Free]](https://static.wixstatic.com/media/f81675_32739f888c5a4ba1aa6bcbeafabc7f83~mv2.png/v1/fill/w_980,h_551,al_c,q_90,usm_0.66_1.00_0.01,enc_avif,quality_auto/f81675_32739f888c5a4ba1aa6bcbeafabc7f83~mv2.png)